Adding an SSH Public Key to GitLab
Follow this guide to copy your SSH public key, add it to your GitLab profile, and verify your connection.
Step 1: Copy Your Public Key
Select your operating system below to copy your public key to your clipboard:
For Linux and OSx, follow these instructions
https://docs.computing.dcu.ie/ssh-keys/02-ssh-keys/
For Windows, follow these instructions.
https://docs.computing.dcu.ie/ssh-keys/04-scp-keys/
To verify your key format before pasting, print it in your terminal:
cat ~/.ssh/id_ed25519.pub
The output should start with ssh-ed25519 or ssh-rsa.
Step 2: Navigate to SSH Keys in GitLab
Sign in to your GitLab account.
https://gitlab.computing.dcu.ie
Click your profile avatar in the upper-right corner and select Edit profile.
In the left navigation sidebar, select Access > SSH Keys.
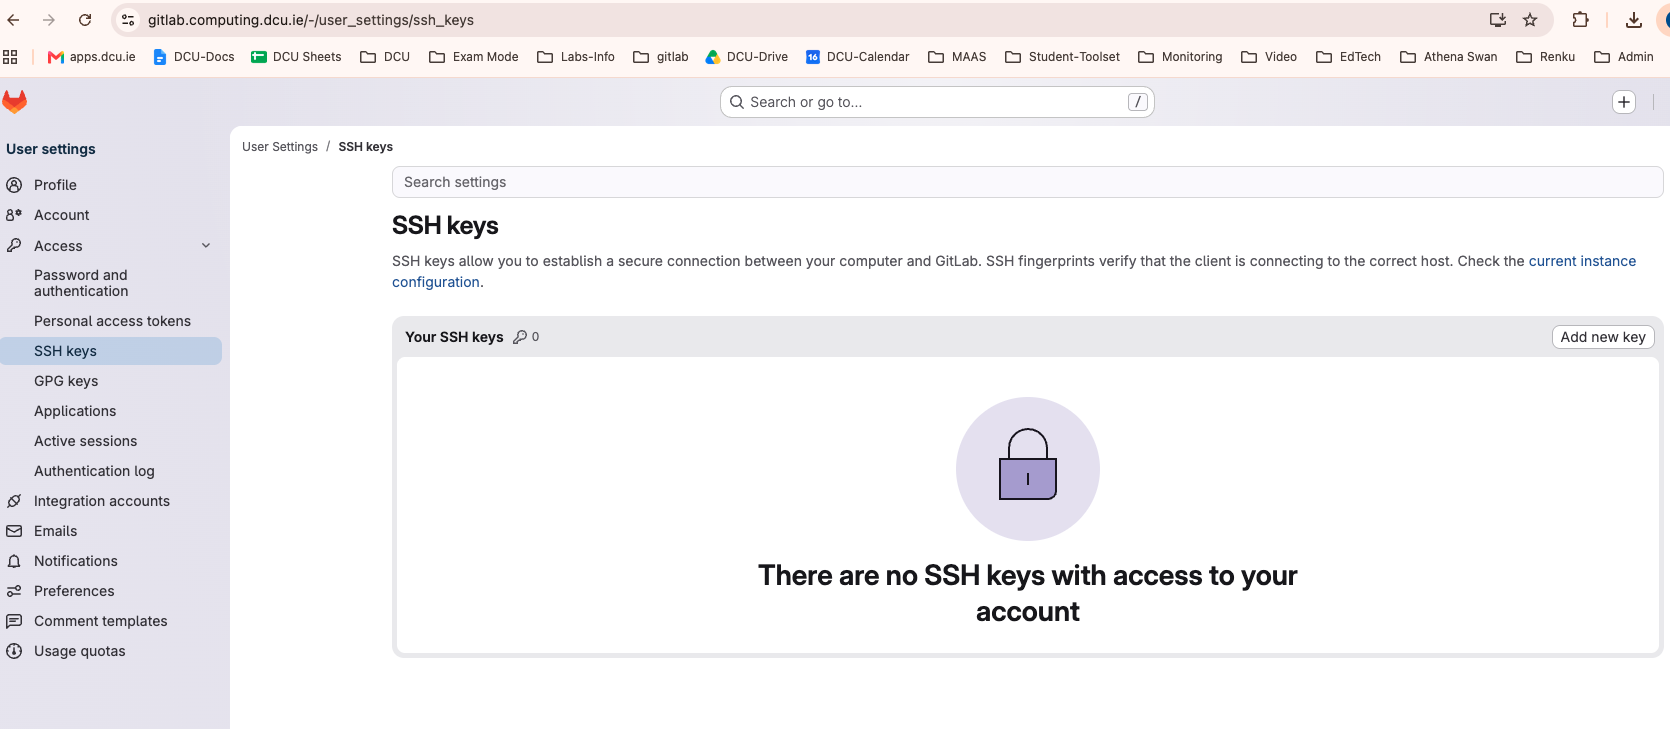
Step 3: Add the Key to Your Profile
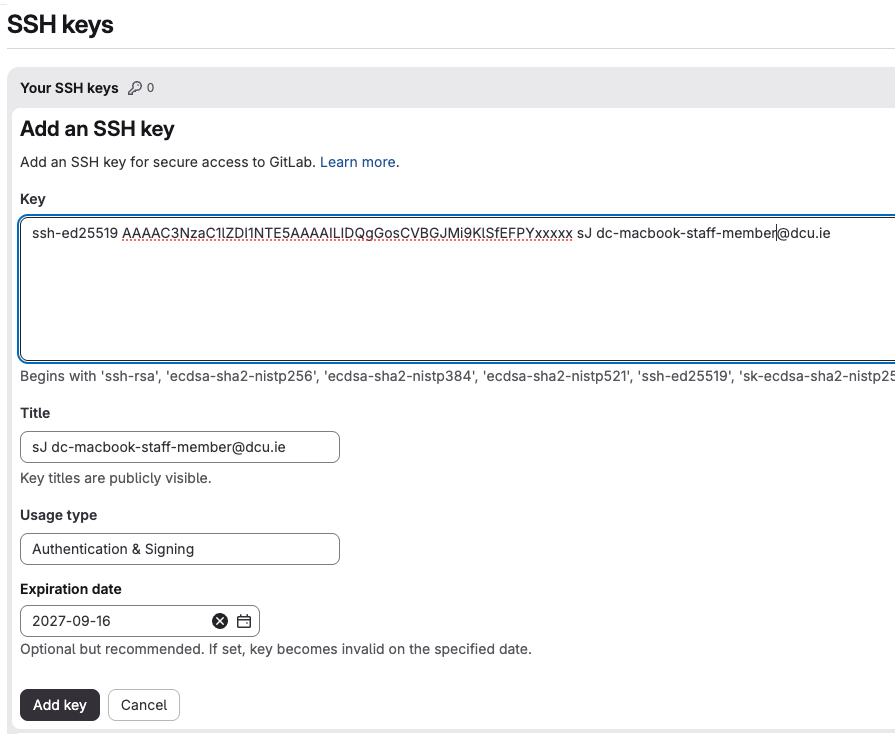
Click the Add new key button.
Paste your copied key into the Key field.
Enter a label (e.g., Work Laptop) in the Title field.
(Optional) Set an expiration date if required by your security policy.
Click Add key.
!!! success "Verification"
Confirm that your new key title and fingerprint appear listed under the Your SSH keys section.
Step 4: Test Your Connection
Run the following command in your terminal to verify authentication:
ssh -T git@gitlab.computing.dcu.ie
Upon successful connection, your terminal will display:
Welcome to GitLab, @your_username!
